How to choose suitable car reverse camera

¿Cómo elegir la cámara de marcha atrás adecuada?

There are two types of reverse car camera: wired reverse camera and wireless reverse camera, wired reverse camera is simple and reliable, but need wiring inside the car or other vehicle; wireless  reverse camera does not need wiring along the interior of car or vehicle,  so it is easy to install, but you need additional wireless receiver . However, current wireless receiver receiving effect is still not very ideal, so most reversing cameras in the market are still wired reverse camera. You can choose wired reverse camera from the following aspects :

How to choose suitable car reverse camera ?插图

Camera Chip

Camera chip is the most important part in reversing camera , they can be divided into CCD and CMOS two kinds. CMOS is mainly used in low image quality products,  its advantages are manufacturing costs and power consumption is lower than the CCD, the disadvantage is the CMOS camera has high requirements for the light source;  CCD chip is mainly used in photography, camera , some high-end technical components also comes with a video capture card.  CCD and CMOS in the technical and performance gap is large, in general, CCD effect is better, but the price is more expensive.

Resolución

Resolution is one of the important indicators when choosing reverse cameras. In general, high-definition reverse camera, its image quality will be better, reverse camera resolution above 420 line has become a mainstream in reversing camera products,  380 lines reverse camera, if debugging properly, can still be a good choice. However, according to different camera chip level, different components, including different technicians’ debugging level , the same chip or the same level reverse camera product output quality may be different; on the contrary, high-definition reverse camera products night vision effect will be reduced.

Night vision

Night vision effect related with reverse camera resolution, higher resolution car reversing camera night vision effect will not be very good, this is because the chip itself, but good quality reverse cameras should have night vision function, and will not affect the image output effect; although the color may be worse, but clearly should not a problem. Car reverse camera with built in infrared light night vision effect will be more clearly visible.

Impermeable

Reversing camera products are basically equipped with waterproof function.
Summary: choose the right reverse camera from the camera aspects per your requirements, the most important thing is to check and  compare the actual image affect.

Is buying and using dashboard camera legal in Germany

¿Es legal comprar y utilizar una cámara de salpicadero en Alemania?

We may have heard of a story before: a driver was taken to court for using a dashcam – Basically, he’d been driving around with his dashcam switched on, and anytime he saw anybody breaking the law, he would report them to the police. The authorities wanted him to stop, why? Because the court felt that it basically amounted to vigilantism , Also, there was an issue of privacy: German privacy laws mean that normally, you can’t just film people without their knowledge.

Is buying and using dashboard camera legal in Germany ?插图

So many people feel that buying and using cámara de salpicadero is illegal in Germany , actually it is not. Germany government never ban the dashboard camera at all, however , dashboard camera is regarded as surveillance camera, you should use it without against privacy law, which means:

You have to unmask / blur a person if he asks you for it and the person is not a public person ( like popular star, big CEO etc ) .

You can take pictures of public events and publish them, but if you focus on a person you have to ask for permission to publish the picture. They just can protest and you just have to react, but that not illegal.

You can using dashboard camera to protect your own safety, properties when pedestrians, cyclists and other drivers do stupid things.

So actually in current years, every car owner should install a dashboard camera in his own vehicle, we hope these captured video won’t have to submitted to court for responsibility identification. But once needed, they can protect us.

Is it legal to use car dashboard camera in United States

¿Es legal utilizar una cámara en el salpicadero del coche en Estados Unidos?

It is 100% legal to install a dashboard camera for your car, truck and other kind of vehicles, and legal to capture videos around the vehicles.

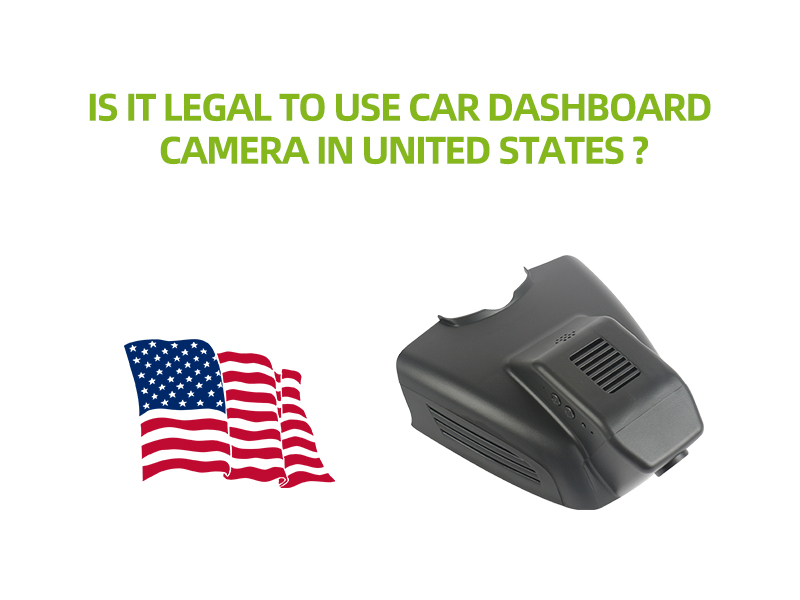
Is it legal to use car dashboard camera in United States ?插图

But sharing those captured videos (which have human faces, other people’s car license plates etc ) to friend or social network such as Youtube, facebook still haven’t got a confident answer on the legality, since these videos may violate other people’s privacy. So we strongly recommend to use the dashboard camera as a backup usage,  so it can be helpful for Police and Insurance company to identify responsibilities in a traffic accident. And if you want to share the beauty captured during your trip with your friends, better add some mask on the human faces and others’ car license plate.

Luview is willing to provide high quality customized dashboard camera for Mercedes Benz, BMW, Audi, GM, Ford, Cadillac and other vehicles. If you are looking for a reliable dashboard camera supplier /factory in China with competitive price, then you are come to the right place. Please contact us by email: sales@luview.com ,  you will be served shortly.

Cómo ocultar los cables de la cámara del salpicadero dentro del coche u otros vehículos

¿Cómo ocultar los cables de la cámara del salpicadero dentro del coche u otros vehículos?

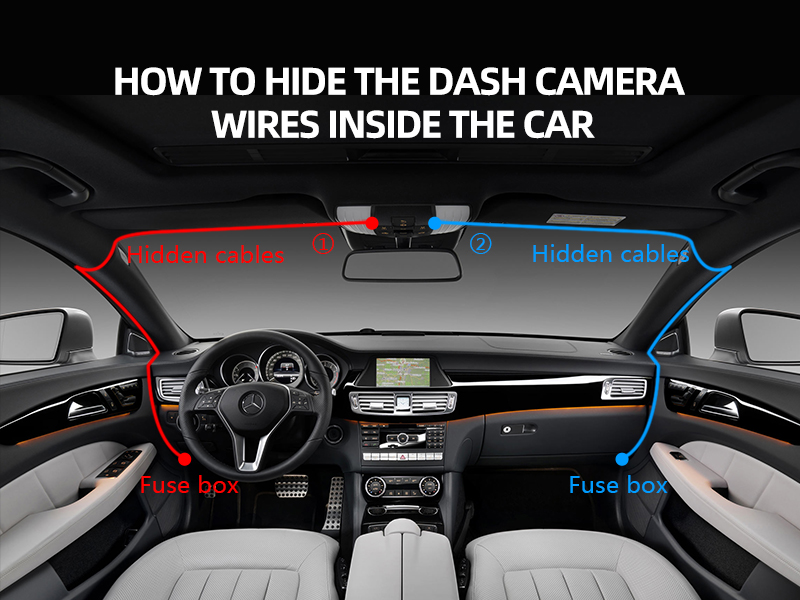
How to hide the dash camera wires inside the car or other vehicles ?插图

Today, we are glad to writing a post on how to hide the cámara de salpicadero wires into the nooks and crannies around the perimeter of the vehicle inner space, now there’s a lot of spots that you can hide a wire in, and we’re going to jump into some of them to organize your wires easily ,ideally you will have to use some wire clips, usually they’re included in your dash camera kits, the wire clip has an adhesive on one side and on the back there is a hook, you can actually buy these wire clips online, they’re pretty cheap as well, otherwise you can also use some tapes. I am going to use wire clips in the visible areas but underneath the dashboard, i will use the tapes instead.

dashboard camera wiring diagram

Take your cord up into the headliner and start tucking away until you reach the side, now run your wire until you’re under the dash, go towards the center dashboard and stash away your excess cables on the side, then plug in, any extra slack wires should be neatly tucked away beside your console, you can easily run the wire upwards into the headliner on the new vehicles, however you have to check if there’s a cover you can hide the cable behind on older vehicles, you can tape your wiring to the mirrors, check if it’s closed otherwise keep it straight, there’s no need to attach it to the window, the headliner can be gently pulled down and the wire pushed in to start stuffing, I recommend going towards the passenger side, as a fallen cable won’t interfere driving, but it’s really up to you, once you reach the end, i found running the cabling inside the weather sealing or side trim is easier and hides more of the cabling, start by examining your door frame for areas where the cable is securely held and won’t share the cable when the door is closed, the alternative is to run it alongside the windshield, you might have to use tape or a wire guide as the trim can be difficult to press int.

dashboard camera wiring diagram

Once you reach the end, you will have to bring it back out and drop it alongside your board, again look for any areas you can place your cabling, if nothing exists make sure the cable stays straight either from pulling it underneath your dashboard or by using a wire guide, this ensures it won’t be caught inside your door, whatever method you choose the goal is to reach underneath your dashboard, once you look for any sort of hooks or areas you can wedge your cable into, you can go nuts with cable ties or tape here as it won’t be seen, if you’re lazy you can place your floor mat over the cable, making sure any passengers won’t get caught up on the wiring. I’ve used this method before a couple months with no damage and no problems, once the cable is beside your dashboard, shove all the loose wiring beside your seat and plug the end in, so now you’re done, congratulations.

Tutorial de instalación DIY de cámara de visión trasera y monitor lcd

Tutorial de instalación DIY de cámara de visión trasera y monitor lcd

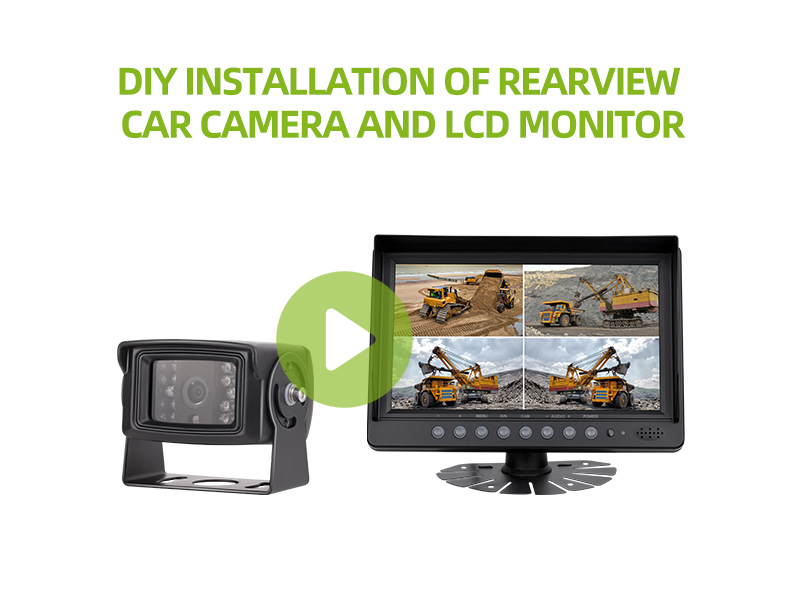
Siempre estuve pensando en escribir un tutorial sobre cómo instalar el cámara de marcha atrás y pantalla lcd juntos al propio coche del usuario, como he visto muchos consumidores prefieren comprar cámara de marcha atrás y monitor lcd Ellos mismos directamente del fabricante en lugar de comprar a un revendedor o un agente, y luego DIY instalación de sí mismos, ya que esto les asegurará la adopción de las mejores cámaras y monitores de calidad con el presupuesto más bajo, al mismo tiempo, la satisfacción es un orgullo final. Sin embargo, cuando los recursos de abastecimiento en Internet, me encontré con un vídeo de bricolaje publicado por el Dr. Fuss realmente perfecto, así que decido compartir este video a Luview cámara de visión trasera del coche y los usuarios del monitor LCD ;También he reorganizar las palabras, por lo que es más legible para aquellos que tienen acceso limitado a Youtube. A continuación se muestra el vídeo y artículos, espero que podría ayudar a nuestro usuario o comprador.

Tutorial on how to DIY installation of rearview car camera and lcd monitor插图

Es Dr. alboroto aquí y en este video, voy a sustituir la cámara de visión trasera que he instalado alrededor de tal vez seis siete años atrás es una inalámbrica y realmente no funcionaba tan bien, una gran cantidad de interferencias, así que voy a ser la eliminación de este viejo aquí y sustituirla por una con cable así que me fui en eBay y recogió esta pantalla LCD de 4,3 pulgadas aquí y también esta cámara de visión trasera, permítanme mostrarles lo que hay dentro, así que de todos modos este es el 4. 3 pulgadas LCD con un cableado en el interior, también aquí es la cámara de serie viene con un cable largo para que pueda ejecutar desde la parte trasera a la parte delantera del cable de alimentación del coche, esto es la cámara en sí muy pequeño muy compacto, así que antes de que yo estoy aquí.3 pulgadas LCD con un cableado en el interior, también aquí está la cámara de serie viene con un cable largo para que pueda ejecutarlo desde la parte trasera a la parte delantera del cable de alimentación del coche, esta es la cámara en sí muy pequeño muy compacto, así que antes de instalar esta nueva cámara en la pantalla LCD corrí una prueba rápida, básicamente, un cableado tanto la cámara y LCD a mi fuente de alimentación de 12 voltios aquí y los poderes de prueba rápida hasta la pantalla LCD se ve bien, la cámara se ve bien también.

por lo que está en este lado usted no tiene que quitar toda la cosa, utilizando la asociación buen acceso al cable a continuación, para el sello de goma, básicamente, sólo tire de la junta de goma, quito este ir alrededor de la pintura de todo el quitar toda la cosa el lado que usted necesita para trabajar, tire del resto aquí, ahora por aquí tienes estos ganchos de correa de plástico aquí con cuidado, sí usted no sabe aflojar que la derecha apagado y uh hay otro por debajo de aquí por aquí con esta pieza inferior.

Básicamente, hay clips detrás de ella y clips por debajo de aquí, así que tire hacia arriba de esta manera en primer lugar en el panel lateral, básicamente, sólo tire de él hacia atrás liberar los clips, también es necesario seguir este diente, aquí es de goma - y luego poner los pies de accesoel cable de la escotilla trasera en el coche, así que lo primero que voy a hacer es tomar el largo cable RCA y alimentarlo a través de este tubo de goma aquí y en la bolsa trasera aquí, ahora tengo el viejo cableado aquí, así que podría usar eso para ayudarme a guiar que a través de, pero si no, básicamente, utilizar un destornillador o una percha y la alimentación a través de, me refiero a la longitud de este no es muy largo, así que no es tan difícil, así que vamos a este extremo, queremos que a continuación es, básicamente, poner la cámara en la que desea que a continuación, una vez que está alineado, marque el agujero y luego vamos a seguir adelante y montar la cámara, pero los dos tornillos de arriba llegó a la cuenta por lo que es lo que la cámara se parece, es montado ahora, vamos a pasar este RCA en el coche, así que no hay realmente una manera fácil de hacerlo en este vehículo, en otros vehiculos podrias encontrar un agujero mas grande pero yo voy a tener que usar un escalon, lo necesitas y poner un agujero justo en el medio aqui, y luego pasar este cable a traves, voy a deslizar un trozo de cinta adhesiva aqui solo para darle un poco de borde mas suave, asi cuando un cable no va a seguir rozandolo, para cerrar ese agujero tengo un poco de cinta adhesiva de aluminio, y las consigues en todas las tiendas de hogar, corto un trozo y voy a cubrir el agujero con esto tambien, ahora una cosa que me acabo de dar cuenta de este cable que traje desde el interior del coche a la escotilla aquí es un cable RCA, tengo este cable que en el interior tiene dos conductores, uno va a ser para su inversa de 12 voltios y los otros en el fondo, y corremos esto en paralelo con este cable aquí, ahora que tiene el agua se extendió y seguir adelante y cerrar algo de él que va a los agujeros adecuados aquí, entonces vamos a alimentar con cuidado el cable así que adelante y la ruta de los cables a lo largo de aquí y utilizar algunas envolturas de corbata para hablar con los cables existentes.

Ahora quiero señalar que el cable RCA de 20 pies también tiene este cable rojo ahora en ambos lados, hay este cable rojo y se puede utilizar para llevar a su inversa 12’o, y es por eso que voy a utilizar para, pero voy a traer a mi poder en casa que corrió el cable para el vídeo y luego también corrió un cable de alimentación, por lo que este poder cables que van de nuevo en el coche y conectarse a la inversa de 12 voltios, así que lo que voy a hacer es que este cable que va de nuevo en el coche y conectarse a que la marcha atrás de 12 voltios que va a alimentar, me voy a conectar a la roja aquí, excepto la energía de la cámara y también no estoy toque este cable desde el cable RCA en el 12-voltios, también aquí y este cable que se ejecuta todo el camino hasta la parte delantera del coche va a obtener la marcha atrás de 12 voltios a la pantalla LCD, así que eso es lo que voy a poder todo el uso de la luz de marcha atrás aquí.

Bien, ahora que todo está conectado, seguir adelante y seleccione el poder para el conector de alimentación de la cámara y el uso de Tyra asegurar el cable aquí, por lo que en este punto la instalación de la cámara se hace, sólo tenemos que poner la tapa de nuevo, también las escotillas de nuevo juntos, seguir adelante ruta de los cables a lo largo del lado aquí en el coche.

Bien, déjame hablar de lo que estoy haciendo aquí ahora, porque yo tenía una cámara de marcha atrás anterior, ya he aprovechado la luz de marcha atrás en la parte trasera de este coche y eso es lo que este cable azul es, y todo lo que hice la última vez fue básicamente tirar de esta luz, usted tiene el arnés de cableado y usted necesitará un voltímetro, bien vas a necesitar un voltímetro, y sondear el cable que va a la luz de marcha atrás, lo que necesita para sondear básicamente, por lo que uno va a estar en el cable y uno va a estar en tierra, y así es como se lee el 12 voltios, que alguien le ayude a poner el coche en marcha atrás y luego una vez que está en marcha atrás, entonces verás que hay 12 voltios en el cable, Ahora lo que voy a hacer aquí es conectar a tierra un terminal de anillo como el que ves aquí y atornillarlo al lateral del coche, eso me dará la tierra y de nuevo el cable rojo va a ser el 12v de la marcha atrás, oh, eso se conecta a las luces de marcha atrás y al cableado, Ok, aquí puedes ver la parte donde la tierra se conecta al chasis del coche, y me conecté a una cámara de marcha atrás de 12 voltios en el cable de marcha atrás de un dipolo, así que lo siguiente que tienes que hacer es el otro extremo del cable RCA es ejecutar este cable, a lo largo del interior del coche y todo el camino hasta la parte delantera del vehículo.

Ahora para pasar el cable desde aqui hasta atras de la tercera fila, puedes usar una percha como estoy haciendo aqui, y esto solo pon la percha hasta el fondo aqui, y jala a traves y eso es lo que he hecho aqui, asi que aqui esta el RCA, en este punto puedes seguir adelante y cerrar todo en la parte de atras ahora, aqui estoy en la puerta lateral y con la mayoria de los autos estos escalones laterales basicamente jalas hacia arriba, son clips en ellos, solo puedo quitarlos.

Ahora cuando usted consigue el alambre al b-pilar, ése es una almohadilla a la derecha detrás del asiento del conductor, este panel es típicamente absolutamente difícil de tomar hacia fuera, porque los cinturones de seguridad también anclan a aquí, así que lo que hago típicamente lo meto debajo, pegue su dedo debajo y meta el alambre debajo, así que eso está fuera de la manera apenas funcione esto hasta el final a la puerta delantera y después ponga el panel detrás encendido, Cuando hayas terminado, pasa el cable siguiendo el haz de cables que ya está en el pilar, básicamente lo que tienes que hacer es tirar del burlete hasta arriba y luego por aquí habrá clips, sólo tienes que echar una mano y soltar los clips, como puedes ver el cable RCA es demasiado corto, Estoy seguro de que si se instaló en un sedán a continuación, este cable es probablemente lo suficientemente largo, pero tengo que llevar esto hasta el final en el pilar A, todo el camino hasta aquí y el cable LCD no es muy largo, así que lo que tengo aquí es un cable de extensión, básicamente, es un cable RCA con un adaptador en el medio, lo que me permitirá conectar este extremo a ese extremo y extender este cable de salida de vídeo todo el camino hasta el monitor LCD, la otra cosa que voy a necesitar extender va a ser el cable rojo de 12 voltios que estaba conectado en la parte trasera y voy a extenderlo hasta el pilar también por debajo de él - voy a encontrar una toma de tierra, por lo general vamos a encontrar un perno de algún tipo o puedes hacer tu propia toma de tierra por debajo del salpicadero, y esa será mi toma de tierra por lo que se completará la conexión. Tengo el video que es el RCA amarillo, el cable rojo es mi inversa 12 voltios y en mi tierra, eso es todo lo que se necesita para completar el cableado por lo que corrió el agua a través de esta ranura asegúrese de meterlo, por lo que no se pellizque todo el camino hasta aquí y también corrió el cable de alimentación de extensión, Tengo la toma de tierra y el inversor de 12 voltios aquí arriba está la extensión para el RCA de vídeo, así que he decidido montar la pantalla LCD por encima del espejo retrovisor, así que la parte de atrás aquí en la base hay una cinta adhesiva de doble cara, simplemente despega la parte de atrás y pégala, así que ahora mismo estoy metiendo todos los cables en la parte superior del techo y luego cierro esto y eso es todo.

Así que permítanme probarlo, es bastante tarde fuera, por lo que es oscuro fuera y esta prueba le dará una idea de lo bien que funciona la cámara, así que voy a poner en marcha atrás y se ilumina probablemente bueno, 15 pies allí, y la cámara se encendió con bastante rapidez, poner en el parque se apaga y lo ponemos de nuevo en marcha atrás de nuevo, por lo que baja con bastante rapidez, ahora permítanme darles otro vistazo de la cámara en la parte posterior, muy bajo perfil parecía que es una cámara de fábrica, y una cosa que no he mencionado antes es acerca de la cámara y la pantalla LCD que compré es de eBay, pero diferentes vendedores, lo compré así porque quería conseguir el precio más bajo, la cámara que pagué unos doce dólares, y la pantalla LCD que pagué veinte dólares, si usted compra como un kit, por lo general será un poco más caro, así que ten en cuenta que y si usted tiene alguna pregunta, entonces me deja un comentario.
Por qué una cámara de visión trasera con sensor CMOS

¿Por qué una cámara de visión trasera con sensor CMOS?

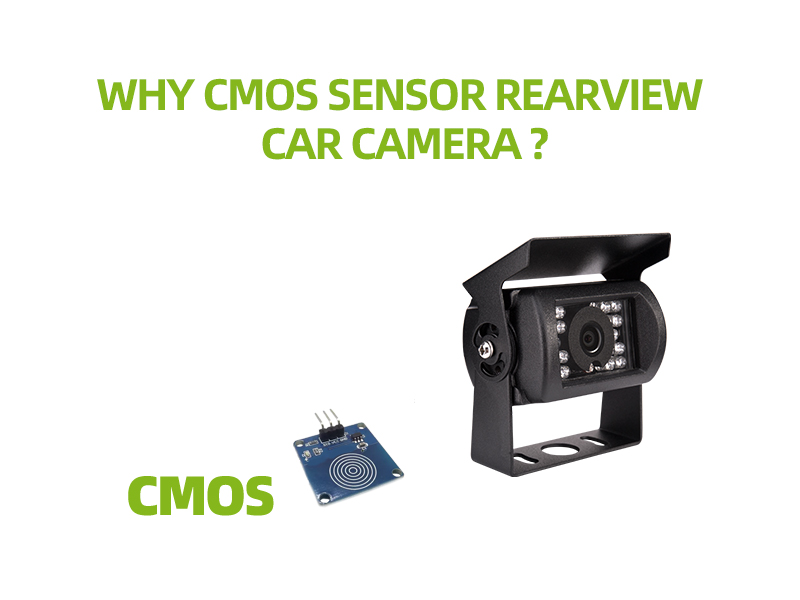
Desde el cámara de visión trasera es cada vez más importante en la vida moderna, especialmente para el nuevo conductor, y ¿sabe usted su tecnología y los requisitos de artesanía? Para aplicaciones de automoción, la cámara del coche y la cámara del teléfono móvil utilizan el mismo sensor de cámara, CMOS en lugar del sensor CCD, las tres razones principales son las siguientes:

Why CMOS sensor rearview car camera ?插图

En primer lugar, el sensor utilizado en la cámara de visión trasera del coche debe tener la característica principal es: rápido. De hecho, CMOS es una tecnología de adquisición de imágenes más rápida: la unidad del sensor MCOS suele estar controlada y leída por tres transistores, lo que acelera considerablemente el proceso de adquisición de imágenes. En la actualidad, las cámaras de alto rendimiento basadas en CMOS pueden alcanzar un nivel de unos 5.000 fotogramas por segundo.

En segundo lugar, los sensores CMOS también tienen la ventaja del procesamiento digital de imágenes. Los sensores CCD suelen proporcionar señales analógicas TSC / PAL, que pueden tener que convertirse utilizando un convertidor AD adicional, o el sensor CCD debe trabajar con una pantalla de método de barrido progresivo para la salida de imagen digital. En cualquier caso, el uso de cámaras CCD para proporcionar señales de vídeo digital aumenta significativamente la complejidad del sistema, y el sensor CMOS puede proporcionar LVDS o señal de salida digital, pantalla lcd puede ser directamente, sin demora para hacer frente a estas señales.

En tercer lugar, el coste del sensor CMOS es inferior al del sensor CCD. Y, cuando hay una fuerte luz en el sensor CMOS, el sensor CMOS no producirá ruido Smear como el sensor CCD. Esto reducirá el tiempo de ajuste debido a errores operativos.

¿Se puede sustituir el espejo retrovisor del coche por cámaras?

¿Se puede sustituir el espejo retrovisor del coche por cámaras?

Por supuesto, y esta es la tendencia futura.

En 2010, Nissan presentó en el Salón del Automóvil de Ginebra su espejo retrovisor inteligente. Este espejo retrovisor inteligente fue construido en el tablero del monitor LCD, cuando sea necesario, la cámara trasera de 1,3 millones de píxeles puede enviar las imágenes traseras al panel de visualización del espejo retrovisor, mostrando detalles detrás del coche en la pantalla.

En el Salón Internacional del Vehículo Comercial de Hannover 2014, Mercedes-Benz utilizó una cámara de visión trasera en lugar del espejo retrovisor en su camión conceptual.

Tesla Model X, también canceló el espejo retrovisor en la primera aparición, el uso de micro-cámara en su lugar (pero esto ha violar las regulaciones pertinentes de Estados Unidos, tuvieron que volver a la tradicional espejo retrovisor en la versión final).

Con el desarrollo de la tecnología de cámaras y la reducción de los costes de fabricación, creo que cada vez más fabricantes de automóviles probarán esta tecnología. Entonces, ¿cuál es la ventaja de utilizar cámaras en lugar de espejos retrovisores?

Can the car rearview mirror be replaced with cameras ?插图

1. Proporcionar al conductor una visión más amplia. Utilizando de cuatro a cinco cámaras gran angular dispuestas en la parte delantera, lateral y trasera del vehículo, proporciona una vista aérea de 360 grados del vehículo sin puntos muertos. Espejo curvo debido a la observación óptica del ángulo y el impacto de la distorsión óptica, el alcance y la calidad de imagen están sujetos a ciertas restricciones. Además, a través de la visual
sensor, se puede lograr el control automático de los faros, cuando el vehículo cerca del coche que viene de frente o adelantar, detectar automáticamente las luces y la autorregulación de la luz lejana y cercana, para asegurar que el conductor tiene una buena visión. Además, el uso de sensores de baja sensibilidad y diseño antideslumbrante, puede garantizar al conductor un espacio de visión completo para una conducción segura y una mejor protección.

2. Reducir el coeficiente de resistencia y reducir el consumo de combustible. Los investigadores a través de dos modelo de coche: uno con espejos retrovisores exteriores y tiradores de las puertas, el otro sin espejo retrovisor y tirador de la puerta; y luego a través del software de simulación CFD para analizar el coeficiente de resistencia, y finalmente obtener los siguientes resultados:
Si se suprimen los espejos retrovisores y la manilla de la puerta, el área de ceñida del vehículo se reduce en 2,56%, y la resistencia al viento durante la conducción disminuye en 12,56%. De los resultados anteriores podemos ver que el efecto es más significativo si se eliminan los espejos retrovisores.

3. Más posibilidades de diseño. Todos sabemos que el primer coche es sin espejo retrovisor, el conductor tiene que mirar hacia atrás al dar marcha atrás, la aparición de espejo retrovisor es un gran salto para la seguridad del coche, pero la forma del coche también es limitada, porque es requisitos reglamentarios. Cancelar el espejo retrovisor, sin duda es útil para los diseñadores. Creo que con el salto de la tecnología electrónica, la cámara puede ser cada vez más pequeño, hasta que podamos organizar en un espacio muy pequeño.

Sin embargo, el espejo retrovisor tradicional en realidad no ha sido reemplazado. En primer lugar debido a factores reglamentarios, pero las cámaras todavía tienen un montón de tecnología clave no está completamente resuelto. Tales como la alta fiabilidad, después de todo, los componentes electrónicos, en relación con un vaso, la fiabilidad es menor, una vez roto, conductor realmente tenía que volver a los viejos años del coche.

Estos problemas tecnicos, de coste, se resolveran uno a uno con el desarrollo de la tecnologia, hace veinte anos, muchos coches no tenian carmeras de marcha atras, sensor de marcha atras, ahora se puede ver estas cosas son equipamiento de serie para los coches.asi que vamos a esperar y ver los anos de espejo retrovisor del coche totalmente sustituido por camaras de coche.

¿Cuál es la diferencia entre las cámaras para el hogar y las cámaras para el coche?

¿Cuál es la diferencia entre las cámaras para el hogar y las cámaras para el coche?

In daily life, we have been used a lot of mobile phone camera and computer camera , can these cameras be used as car cameras ? What is the difference ? Shenzhen Luview Co., Ltd will tell you how to distinguish between car cameras and home cameras:

What is the difference between home cameras and car cameras ?插图

Car camera has certain requirements for installation , it requires a small and light installation size so that the passenger’s driving environment won’t be affected and the cameras needed to be fixed firmly to avoid affect monitoring effect, there is a certain degree for anti shock performance, the most important is that the car camera need to have a built in infrared light, so it can easy easy to monitor surroundings even when the lightness is not good, such as in the dark night.

Home camera is mostly used in interior design, unlike the car reversing camera mainly for outdoor usage, the production process, waterproof level, anti aging performance, anti shock performance etc are not in the same industrial technology level, which is why the market price of the car camera usually several times more expensive than home or computer cameras.

In addition, the car camera has been improved in night vision effect, high definition and wide view angle,the car camera use the industrial level camera chip.

Again, the car camera pixels usually much lower than the mobile phone camera pixels, the newly released iPhone 8 mobile phone camera pixels have reached 20 million pixels, while the high-end car rearview camera pixels is only 100 million, and general car camera pixels only about 300,000.

Guía de instalación DIY del sistema inalámbrico de cámaras de visión trasera para coches

Guía de instalación DIY del sistema inalámbrico de cámaras de visión trasera para coches

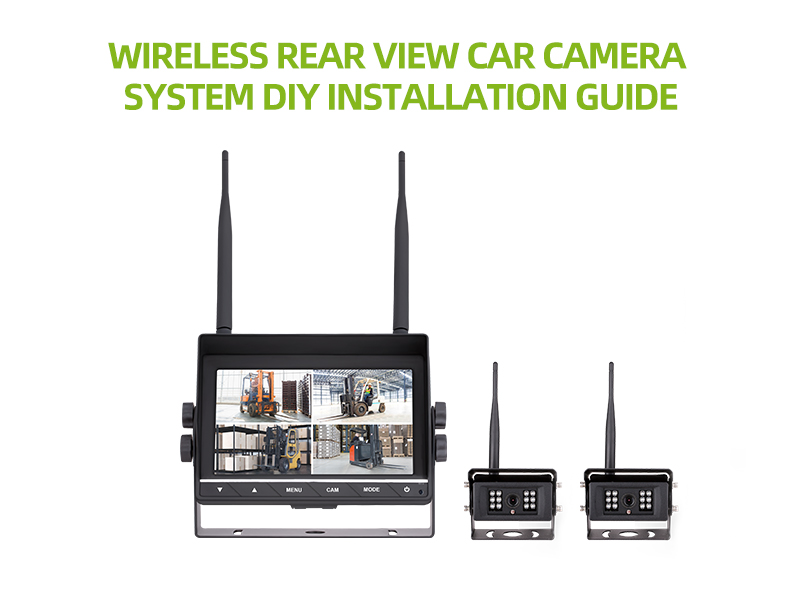
Rear view cameras have become a more and more popular safety feature which is a regular feature of many new cars.In only a couple of years, backup cameras will become mandatory on all new cars. For old car without rear view camera system, You can DIY the rear view camera system installation yourself. The best rear view camera system for installation is a wireless rear view camera that utilize the existing rear license plate mounting holes. It is much far easier than a wired rear view camera installation because you don’t need to arrange several fts of video cables from the rear part of your car, throughout the cabin, and guide to the dashboard. Other than that, any rear view camera installation process is almost the same.

Ultimate Wireless Rear View Car Camera System DIY Installation Guide插图

Tools needed: the tools you will need are simple:

1.Either a blade or screwdriver to remove the license plate, license plate light, and mount the rear view camera;
2.Double-sided adhesive tape to stick the transmitter or power supply in the rear part of your vehicle;
3.Drill driver:You may want to use a drill driver to mount the wireless transmitter inside the rear part of your vehicle;If you are unable to utilize the license plate light to route wiring, you may need to use a drill to make a small hole to route the wires;
4.Rubber liner:If you do have to drill a hole, make sure you use the rubber liner that comes with the kit to protect the wires from the rough edges of the hole;
5.Insulating tape to splice the power cables for the rear view camera with the backup light wiring;
6.Make sure you have an available 12V power output port to plug-in the mounted on dashboard monitor or have a plan on how your will hard-wiring mounted on dashboard monitor with your existing under-dash wiring;

Each wireless rear view camera system comes with three main components: a camera, a transmitter, and a video ( camera ) display/monitor.Below are general wireless rear view camera system installation steps:

1.Mount the rear view camera

1.1. Mount the rear view camera on the rear license plate by removing the license plate mounting screws and utilizing them to mount the rear view camera.
1.2. Every vehicle requires a lighted rear license plate and that is done usually with two lights on either side of and above the plate. Remove the light closest to the camera mount’s wiring source and route the wires through the hole with the other light wires. Replace the license plate light.
1.3. Route the wires from the rear part of your car or trunk to the closest rear taillight housing. You will need to identify which is the backup light wire and connect the rear view camera power wire to the backup light wire. This can ensure that the rear view camera system only running when your car is in reversing process. This is good for safety purposes.
1.4 The wireless transmitter may also be mounted inside the trunk or rear part of the vehicle and connected to the wire from the camera. As soon as that’s done, you have been finished all things on the rear part of the car.

2.Mount the camera monitor

2.1. The monitor is easy to install,however may be troublesome to have a good finishing and looking. Most dashboard minitor simply plug right into a 12V power output port such as a cigarette lighter for power supply and even have the receiver to get power from the cigarette lighter.
2.2. The camera monitor can usually be mounted on the dash board or windshield with the included mount base.
2.3. Some camera monitor come in the form of a replacement digital rear view mirror. These digital rear view mirror are usually mounted over the existing rear view mirror with built in adjustable clamps. A
rearview mirror camera system which convert the existing rear view mirror into a digital rear view camera system is more difficult to install and those steps are not covered here.
2.4. If you want to hide the wiring, you can fix the power cord into the headliner, down the A-pillar, underneath the dash, and either to the nearest 12V power plug or wired directly into the vehicles wiring.

3.Test the rear view camera system

3.1. Turn on the car and check the car during reverse. The camera monitor should power on automatically with the rear view camera captured video displayed.
3.2. When you drive the car’s to any other position, the camera monitor screen should be blank.

It’s so easy to install a wireless backup rear view camera into your vehicles, that is why wireless rear view car camera system is so popular on the market.With your brand new aftermarket rear view camera system installed, you can reverse and park safer than before.

Luview Co., LTD has been focused on developing and manufacturing all kinds of security vehicle camera products and solutions for 11 years,we are able to offer best quality rear view camera system at competitive for most branded vehicles. If you have interests in became Luview wireless rear view camera system dealer or want to find a local dealer or reseller for Luview wireless rear view camera system, please email us at sales@luview.com, you will get far more than satisfication.

6 cosas imprescindibles para viajar con tu propio coche en verano

6 cosas imprescindibles para viajar con tu propio coche en verano

It is the hottest season of year now, do you planning to go for a serious travel driving your own car to prevent sunstroke ? If yes, here were prepare a list of 6 must having things for travelling with your own car in the summer.

6 must having things for travelling with your own car in summer插图

1. Rearview car camera: If you spend a lot of time in the car for a long trip travelling, it is better to have an big inner space car such as SUV or RV. They are particularly convenient and can bring extra room for your travel. But when you drive these giant vehicles, it’s essential to have a backup camera system or truck back rearview car camera, so you can see behind when reversing or parking into a tight space.

2. CDs: A travelling journey without music is boring. And in some parts of the country there is no radio station at all. So having some pleasant Blue, Jazz, Popular song cds or even videos is important to make your journey even more happier.

3. Sun glass: You may experience various terrains and sun glass will helps to protect your eyes from the desert sun as well as the blinding snow white in mountain.

4. Sunscreen: When you’re out for walking and adventuring, it’s crucial to protect your skin.Sunscreen will keep away from you burning by sun.

5. Camera: It’s a useful device to store the good memories. You’ll probably keep in mind this travelling trip forever, but you may forget the beautiful desert flowers in bloom. Take photos of them so you will never forget .Well , if you have a smartphone with high definition camera and large storage space (such as iPhone 7 plus with 12 million pixels camera and 128GB memory card or even 256GB memory card ), then you may no need to bring an extra SLR camera, as this kind of smartphone is enough for a spare time camerist. Besides, smartphone will provide additional GPS and maps for your travelling.

6. Hiking Shoes: Even hardy sneakers can get the job done. It’s possible you’ll want to go out and explore, and proper footwear is very important as well.

Before you set out, make sure your car is in good service and maintained and try to keep your fuel tank full throughout the trip. In rural areas, fuel stations can be sparse, so it’s better to make your fuel tank level safe rather than calling for rescue numbers.