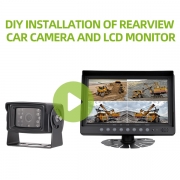
Tutorial on how to DIY installation of rearview car camera and lcd monitor

Tutorial on how to DIY installation of rearview car camera and lcd monitor

I was always considering to write a tutorial on how to install the rearview backup camera and lcd display together to user’s own car, as i have seen many consumers prefer to buy rear view backup camera and lcd monitor themselves directly from manufacturer instead of buy from a reseller or an agent,  and then DIY installation themselves, as this will ensure them adopting the best quality cameras and monitors with the lowest budget, at the same time, the satisfaction is a ultimate proud.  However, when i sourcing resources on the internet, i found a DIY video published by Dr. Fuss really perfect, so i decide to share this video to Luview rearview car camera and lcd monitor users ;I have also reorganize the words, so it is more readable for those who have limited access to Youtube. Below is the video and articles, i hope it could helps our user or buyer.

It is dr. fuss here and in this video,I will be replacing the rear view camera which I installed about maybe six seven years ago it’s a wireless one and it really didn’t work that well, a lot of interference, so I’m going to be removing this old one here and replacing it with a wired one so I went on eBay and picked up this 4.3 inch LCD display here and also this rear view camera, let me show you what’s inside, so anyways this is the 4.3 inch LCD with a cabling inside, also here is the serial camera comes with a long wire so you can run it from the back to the front of the car power cable, this is the camera itself very small very compact, so before I installed this new camera in the LCD screen I ran a quick test, basically a wired both the camera and LCD to my 12 volt power supply here and the quick test powers up LCD screen looks good, camera looks good too.

so who’s on this side you don’t have to remove the whole thing, using the association good access to the wire then for the rubber seal basically just pull on the rubber seal, I remove this go around painting all the remove the whole thing the side you need to work, pull the rest here, now over here you got these plastic strap hooks here carefully, yeah you don’t know loosen that right off and uh there’s another one down below here over here with this bottom piece.

Basically there are Clips behind it and Clips underneath here so pull it up this way first on the side panel, basically just pull it back release the clips, you also need to follow this tooth, here is rubber – and then you put access feetthe wire from the back hatch into the car, so the first thing I’m going to do is take the long RCA cable and feed it through this rubber tube here and into the back pouch here, now I do have the old wiring here so I might use that to help me guide that through, but if not basically use a screwdriver or coat hanger and feed it through, I mean the length of this not very long so it’s not that difficult, so we’re going up this end, we want to next is basically put the camera where you want it then once it’s lined up, mark the hole and then we’ll go ahead and mount camera, but the two screws up came the account so that’s what the camera looks like, is it mounted now, we’re going to pass this RCA into the car, so there’s really no easy way about it on this vehicle, some other vehicles you might be able to find a bigger hole but I’m going to have to use a step up, you need it and put a hole right in the middle here, and then feet this wire through, I’m gonna slip a piece of tape in here just to give it a little bit of smoother edge, so when a wire there’s not gonna keep rubbing on it, the close up that hole I got some ducting aluminum tape, and get these at all home people, I cut a piece off and I’m gonna cover the hole with this too, now one thing I just realizes this cable I brought from the inside of the car to the hatch here is is an RCA cable, I have this cable which inside has two conductors, one is going to be for your reverse 12-volt and the other ones in background, and we run this in parallel with this cable here, now that you have the water spread and go ahead and close something from it that goes to the proper holes here, then we’ll carefully feed the wire so go ahead and route the wires along here and use some tie wraps to talk to the existing wires.

Now I want to point out the 20-foot RCA cable also has this red lead now on both sides, there is this red wire and you can use it to carry your reverse 12’o, and that’s why i’m going to use it for, but I’m going to bring in my home power which I ran the wire for the video and then also ran a power cable, so this power cables that go back into the car and connect to the reverse 12-volt, so what I’m going to do is that this wire that goes back into the car and connect to that reverse 12-volt it’s going to power, I’m going to connect to the red here except power the camera and also I’m not tap this wire from the RCA cable onto the 12-volt, also here and this wire that run all the way to the front of the car is going to get the reverse 12-volt to the LCD screen, so that’s how I’m gonna power everything using the reverse light here.

Okay now that everything is connected, go ahead and select the power to the power connector on the camera and using Tyra secure the wire here, so at this point the camera installation is done, we just gotta put the cover back on now, also the hatches put back together, go ahead route the wires along the side here into the car.

Okay let me talk about what am i do here now, because I had a previous reverse camera, I already tapped the reverse light on the back of this car and that’s what this blue wire is, and all I did last time was to basically pull this light out, you have the wiring harness and you’ll need a voltmeter, okay you’re going to need a voltmeter, and probe the wire that goes to the reverse light, you need to basically probe it, so one is going to be on the wire and one is going to be on ground, and that’s that’s how you read the 12-volt, have someone help you put the car in reverse and then once it’s in reverse then you’ll see that there is 12 volt on the wire, so I brought this far in and it goes straight to that wire on the reverse, okay now what I’ll do here is at the ground I’m going to basically tap a ring terminal like you see here and then screw it on to the side of the car, that will give me the ground and again the red wire is going to be the reverse 12v, oh that connects to the backup reverse lights and wiring, okay so here you see the part where the ground is tapped into the chassis of the car, and I tapped a reverse cameras power 12 volt into the reverse wire a dipole, so the next thing you need to do is the other end of the RCA cable is to run this cable, along the inside of the car and all the way to the front of the vehicle.

Now to get the wire from here all the way over behind the third row, you can use like a co hanger like I’m doing here, and this just put the coat hanger all the way down to the bottom here, and pull it through and that’s what I’ve done here, so here’s the RCA, at this point you can go ahead and close everything up at the back now, here I’m at the side door and with most cars these sidesteps you basically pull up, they’re clips on it, I can just remove it.

Now when you get the wire to the b-pillar, that’s a pillow right behind the driver’s seat, this panel typically is quite difficult to take out, because the seatbelts also anchor to here, so what I typically do is tuck it underneath, stick your finger underneath and tuck the wire underneath, so that’s out of the way just run this all the way to the front door and then put the panel back on, when you’re done just feed the wire follow the bundle of wire that is already there now on the a-pillar, basically what you want to do is pull on the weather stripping here all the way up and then over here again there’ll be clips, just want to give a hand in there and put to release the clips as you can see with its RCA cable is too short, I’m sure if it was installed in a sedan then this cable is probably long enough but I have to bring this all the way up on the a-pillar, all the way up here and the LCD wire is not very long so so what I have here is an extension cable basically is one RCA cable with an adapter in the middle, which will allow me to connect this end to that end and extend this video output cable all the way up to the LCD monitor, the other thing I’ll need to extend is going to be the reverse 12-volt red wire that was hooked up at the back and I’m going to extend that up to the a pillar also underneath it – I’m going to find a ground, usually we’ll find a bolt of some sort or you can tap your own ground underneath the dash, and that’ll be my ground so that will complete the connection. I have the video which is the yellow RCA, the red cable is my reverse 12-volt and on my ground, that’s all that’s needed to complete the wiring so I ran the water up through this groove make sure tuck it in, so it doesn’t get pinched all the way up here and I also ran the extension power cable, I have the ground and the reverse 12-volt up here is the extension for the video RCA, so I’ve decided to mount the LCD display above the rear view mirror, so the back here on the base there is a double sided tape, just peel the backing off and stick it on so right now I’m just tucking all the wires up top on the headliner and then close this off and that’s it.

So let me test it out, it’s pretty late outside, so it’s dark outside and this test will give you an idea how well the camera works, so I’ll put it in reverse and illuminates probably good, 15 feet there, and the camera came on pretty quickly, put in the park turns off and we put it back in reverse again, so it comes down pretty quickly, now let me give you another look of the camera at the back, very low profile it looked like it’s a factory camera, and one thing I didn’t mention earlier is about the camera and the LCD that I bought is from eBay, but different sellers, I bought it like that because I wanted to get the lowest price, the camera I paid about twelve dollars, and the LCD display I paid twenty dollars, if you buy as a kit, usually it will be a little more expensive, so just be aware of that and if you have any questions, then leave me us a comment.

Why CMOS sensor rearview car camera

Why CMOS sensor rearview car camera ?

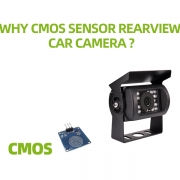
Since the rearview car camera is became more and more important in modern life,espeically for the new driver, and do you know its technology and craftwork requirements? For automotive applications, car camera and mobile phone camera use the same camera sensor, CMOS instead of CCD sensor, the main three reasons as below:

First of all, the sensor used in rearview car camera should have the primary feature is: fast. Especially at high speed driving occasion, the rear view car camera must be able to record critical driving conditions.In fact, CMOS is a faster image acquisition technology – the unit in the MCOS sensor is usually controlled and read out by three transistors, which significantly accelerates the image acquisition process. At present, CMOS based high performance cameras can achieve a level of about 5,000 frames per second.

Secondly, CMOS sensors also have the advantage of digital image processing. CCD sensors typically provide analog TSC / PAL signals, which may have to be converted using an additional AD converter, or the CCD sensor should work with a progressive scan method display for digital image output. In either case, using CCD cameras to provide digital video signals significantly increase the complexity of the system; and CMOS sensor can provide LVDS or digital output signal, lcd display can be directly, without delay to deal with these signals.

Thirdly, CMOS sensor cost is bit lower than ccd sensor . And, when there is a strong light into the CMOS sensor, CMOS sensor will not produce Smear noise as CCD sensor. This will reduce the adjustment time due to operational errors.

Can the car rearview mirror be replaced with cameras

Can the car rearview mirror be replaced with cameras ?

Of course, and this is the future trend.

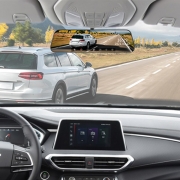
Nissan in 2010 at the Geneva Motor Show released its intelligent rearview mirror. This intelligent rearview mirror was built in the LCD monitor board, when necessary, the rear 1.3 million pixel camera can send the rear images to the rearview mirror display panel, showing details behind the car on the screen.

On 2014 Hannover International Commercial Vehicle Show, Mercedes-Benz use a rearview camera instead of the rearview mirror in its concept truck.

Tesla Model X, also canceled the rearview mirror in the first appearance, use micro-camera instead (but this has violate the relevant US regulations, they had to back to the traditional rearview mirror on the final version).

With the development of camera technology and manufacturing costs have been reduced, I believe that more and more car manufacturer will try this technology. So what is the advantage of using cameras instead of rearview mirrors ?

1. Give the driver a wider view. Using four to five wide angle cameras arranged on the front, side, back of the vehicle, providing 360 degree aerial view of the vehicle without dead points. Curved mirror due to the optical observation of the angle and the impact of optical distortion, imaging range and quality are subject to certain restrictions. In addition, through the visual
sensor, you can achieve automatic headlamp control, when the vehicle close to the oncoming car or overtaking, automatically detecting the lights and self-regulating the far and near light, to ensure that the driver has a good vision. Furthermore, use low-sensitivity sensors and anti-glare design, can ensure the driver full of vision space for safe driving and better protection.

2. Reduce the drag coefficient and reduce fuel consumption. Researchers through two car model: one with outer mirrors and door handles, the other without a rearview mirror and door handle; and then through the CFD simulation software to analyze the drag coefficient, and finally get the following results:
If cancel the rearview mirror and door handle,vehicle upwind area reduced by 2.56%, the car driving wind resistance decreased by 12.56%. From the above results we can seen the effect is more significant if remove the rearview mirrors.

3. More possibilities for styling. We all know that the earliest car is without rearview mirror, driver need to look back when reversing, the emergence of rearview mirror is a great leap for the safety of the car, but the car’s shape is also limited, because it is regulatory requirements. Cancel the rearview mirror, it is certainly helpful for the designers. I believe that with the leap in electronic technology, the camera can be smaller and smaller, until we can arrange it in a very small space.

However, traditional rearview mirror has not really been replaced. First because of regulatory factors, but the cameras still have a lot of key technology is not completely resolved. Such as high reliability, after all, electronic components, relative to a glass, the reliability is lower, once broken, driver really had go back to the old car years.

These technical problems, cost problem, will be resolved one by one with the technology development, twenty years ago, many cars did not have reverse carmeras, reversing sensor, now you can see these things are standard equipment for cars.So let’s wait and see the years of car rearview mirror totally replaced by car cameras.

What is the difference between home cameras and car cameras

What is the difference between home cameras and car cameras ?

In daily life, we have been used a lot of mobile phone camera and computer camera , can these cameras be used as car cameras ? What is the difference ? Shenzhen Luview Co., Ltd will tell you how to distinguish between car cameras and home cameras:

Car camera has certain requirements for installation , it requires a small and light installation size so that the passenger’s driving environment won’t be affected and the cameras needed to be fixed firmly to avoid affect monitoring effect, there is a certain degree for anti shock performance, the most important is that the car camera need to have a built in infrared light, so it can easy easy to monitor surroundings even when the lightness is not good, such as in the dark night.

Home camera is mostly used in interior design, unlike the car reversing camera mainly for outdoor usage, the production process, waterproof level, anti aging performance, anti shock performance etc are not in the same industrial technology level, which is why the market price of the car camera usually several times more expensive than home or computer cameras.

In addition, the car camera has been improved in night vision effect, high definition and wide view angle,the car camera use the industrial level camera chip.

Again, the car camera pixels usually much lower than the mobile phone camera pixels, the newly released iPhone 8 mobile phone camera pixels have reached 20 million pixels, while the high-end car rearview camera pixels is only 100 million, and general car camera pixels only about 300,000.

Rearview mirror hidden camera system protect yourself and others

Rearview mirror hidden camera system: protect yourself and others

No matter what kind of car you drive, there are still blind spots that stop you from seeing what have to see so as to stop a automobile crash. Many vehicle crashes may have been prevented over the years if only today’s vehicle security camera technology had been used. Currently there are many car camera system in the market, in which a hidden type rearview mirror monitor camera system is very popular and favored by high end car owner. With a rearview mirror hidden camera system, you can feel more secure when driving. Using a rearview mirror hidden camera system will give you better vision for what is coming up around you and help to prevent an accident.

Since even today’s new vehicle still have blind spots, add hidden carera system can better ensure vehicle security and safety. It is a safety precaution we all need in today’s world. Now that you know how a rearview mirror hidden camera system can help you in preventing an accident, we’ll cover how it really works and the system features below:

This rearview mirror hidden camera system consist of a 7 inch replacement digital rear view mirror monitor, mini rear view camera and video transmitter including cables. The following is an overview of the features available on the rearview mirror hidden camera system:

* Built in high definition camera – Featuring digital with a 1/4 inch CMOS sensor,648 x 488 pixels, 170°super wide view angle, 15 ft night vision distance,and the top rated IP69K waterproof level make it reliable even in raining days.The 170°super wide view angle ensures your car with no blind spots on the rear part.This camera can be mounted on the rear license plate position, which make it almost visible in your car, that’s why we say it hidden camera.

* Extra Wireless transmitter – With the additional wireless transmitter, you don’t need the annoying wiring in your vehicle.

* Easy to Read LCD Monitor – The monitor is a 7 inch digital LCD replacement mirror monitor that plays or replays activity on your rearview camera. It use the modern touch screen control, which ensures the maximum visible screen size.

This rearview mirror hidden camera system is truly the most revolutionary approach to provide yourself with more effective vehicle security and peace of mind. Please contact [email protected] or visit our official website luview.com if you want to know further information about this rearview mirror hidden camera system.

Ultimate Wireless Rear View Car Camera System DIY Installation Guide

Ultimate Wireless Rear View Car Camera System DIY Installation Guide

Rear view cameras have become a more and more popular safety feature which is a regular feature of many new cars.In only a couple of years, backup cameras will become mandatory on all new cars. For old car without rear view camera system, You can DIY the rear view camera system installation yourself. The best rear view camera system for installation is a wireless rear view camera that utilize the existing rear license plate mounting holes. It is much far easier than a wired rear view camera installation because you don’t need to arrange several fts of video cables from the rear part of your car, throughout the cabin, and guide to the dashboard. Other than that, any rear view camera installation process is almost the same.

Tools needed: the tools you will need are simple:

1.Either a blade or screwdriver to remove the license plate, license plate light, and mount the rear view camera;
2.Double-sided adhesive tape to stick the transmitter or power supply in the rear part of your vehicle;
3.Drill driver:You may want to use a drill driver to mount the wireless transmitter inside the rear part of your vehicle;If you are unable to utilize the license plate light to route wiring, you may need to use a drill to make a small hole to route the wires;
4.Rubber liner:If you do have to drill a hole, make sure you use the rubber liner that comes with the kit to protect the wires from the rough edges of the hole;
5.Insulating tape to splice the power cables for the rear view camera with the backup light wiring;
6.Make sure you have an available 12V power output port to plug-in the mounted on dashboard monitor or have a plan on how your will hard-wiring mounted on dashboard monitor with your existing under-dash wiring;

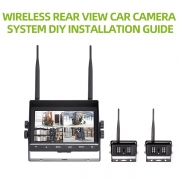
Each wireless rear view camera system comes with three main components: a camera, a transmitter, and a video ( camera ) display/monitor.Below are general wireless rear view camera system installation steps:

1.Mount the rear view camera

1.1. Mount the rear view camera on the rear license plate by removing the license plate mounting screws and utilizing them to mount the rear view camera.
1.2. Every vehicle requires a lighted rear license plate and that is done usually with two lights on either side of and above the plate. Remove the light closest to the camera mount’s wiring source and route the wires through the hole with the other light wires. Replace the license plate light.
1.3. Route the wires from the rear part of your car or trunk to the closest rear taillight housing. You will need to identify which is the backup light wire and connect the rear view camera power wire to the backup light wire. This can ensure that the rear view camera system only running when your car is in reversing process. This is good for safety purposes.
1.4 The wireless transmitter may also be mounted inside the trunk or rear part of the vehicle and connected to the wire from the camera. As soon as that’s done, you have been finished all things on the rear part of the car.

2.Mount the camera monitor

2.1. The monitor is easy to install,however may be troublesome to have a good finishing and looking. Most dashboard minitor simply plug right into a 12V power output port such as a cigarette lighter for power supply and even have the receiver to get power from the cigarette lighter.
2.2. The camera monitor can usually be mounted on the dash board or windshield with the included mount base.
2.3. Some camera monitor come in the form of a replacement digital rear view mirror. These digital rear view mirror are usually mounted over the existing rear view mirror with built in adjustable clamps. A
rearview mirror camera system which convert the existing rear view mirror into a digital rear view camera system is more difficult to install and those steps are not covered here.
2.4. If you want to hide the wiring, you can fix the power cord into the headliner, down the A-pillar, underneath the dash, and either to the nearest 12V power plug or wired directly into the vehicles wiring.

3.Test the rear view camera system

3.1. Turn on the car and check the car during reverse. The camera monitor should power on automatically with the rear view camera captured video displayed.
3.2. When you drive the car’s to any other position, the camera monitor screen should be blank.

It’s so easy to install a wireless backup rear view camera into your vehicles, that is why wireless rear view car camera system is so popular on the market.With your brand new aftermarket rear view camera system installed, you can reverse and park safer than before.

Luview Co., LTD has been focused on developing and manufacturing all kinds of security vehicle camera products and solutions for 11 years,we are able to offer best quality rear view camera system at competitive for most branded vehicles. If you have interests in became Luview wireless rear view camera system dealer or want to find a local dealer or reseller for Luview wireless rear view camera system, please email us at [email protected], you will get far more than satisfication.

6 must having things for travelling with your own car in summer

6 must having things for travelling with your own car in summer

It is the hottest season of year now, do you planning to go for a serious travel driving your own car to prevent sunstroke ? If yes, here were prepare a list of 6 must having things for travelling with your own car in the summer.

1. Rearview car camera: If you spend a lot of time in the car for a long trip travelling, it is better to have an big inner space car such as SUV or RV. They are particularly convenient and can bring extra room for your travel. But when you drive these giant vehicles, it’s essential to have a backup camera system or truck back rearview car camera, so you can see behind when reversing or parking into a tight space.

2. CDs: A travelling journey without music is boring. And in some parts of the country there is no radio station at all. So having some pleasant Blue, Jazz, Popular song cds or even videos is important to make your journey even more happier.

3. Sun glass: You may experience various terrains and sun glass will helps to protect your eyes from the desert sun as well as the blinding snow white in mountain.

4. Sunscreen: When you’re out for walking and adventuring, it’s crucial to protect your skin.Sunscreen will keep away from you burning by sun.

5. Camera: It’s a useful device to store the good memories. You’ll probably keep in mind this travelling trip forever, but you may forget the beautiful desert flowers in bloom. Take photos of them so you will never forget .Well , if you have a smartphone with high definition camera and large storage space (such as iPhone 7 plus with 12 million pixels camera and 128GB memory card or even 256GB memory card ), then you may no need to bring an extra SLR camera, as this kind of smartphone is enough for a spare time camerist. Besides, smartphone will provide additional GPS and maps for your travelling.

6. Hiking Shoes: Even hardy sneakers can get the job done. It’s possible you’ll want to go out and explore, and proper footwear is very important as well.

Before you set out, make sure your car is in good service and maintained and try to keep your fuel tank full throughout the trip. In rural areas, fuel stations can be sparse, so it’s better to make your fuel tank level safe rather than calling for rescue numbers.

Backup camera system improve reverse safety for car, SUV, truck ,van

Backup camera system: improve reverse safety for car, SUV, truck ,van

While most driver feeling that driving a car could be very safe, but most of them agree that there would be an issue while reversing. When reversing, it may be very tough to see objects like rails or obstacles because they can’t be seen from rear view mirror. That is the common issue when driving any vehicle, however it’s even worse in an SUV. Generally speaking, the larger the vehicle is, the bigger the blind spots are. Fortunately, backup camera system can help to improve visibility when reversing.

Backup camera system help drivers to notice even the tightest spots and will not hit anything. A backup camera system usually consist of a rear view camera, dashboard mounted monitor,signal transfer system ( or wire ).The digital camera installed on the rear side of the vehicle will sends signals to the dashboard mounted monitor by wires or wireless signal transfer system. Drivers can view the monitor and see exactly what’s going on behind their vehicle. The back up camera system can prevent most unwanted accidents when used correctly and protect your own safety as well as saving your money. A rear view mirror can’t detect a child playing behind your car, the backup camera system can detect it easily.

Backup camera system can be a lifesaver when driving a recreational vehicle or heavy duty truck ( especially truck carrying containers ).Parking into a camping house or boat dock is a piece of cake when backup camera system is installed and used. Currently, most new vehicles are equipping a backup camera system as a part of the standard package.But it is still easy to add backup camera system to old vehicle or new vehicle without this package.

When shopping for backup camera system, you need to consider size of the vehicle it will be mounted on. Backup camera system for truck or recreational vehicle is totally different than what can be used on a compact car for daily usage. One factor you should consider in the backup camera system is night vision ability. Generally, choose a backup camera system with 20-40ft night vision distance is good enough for most vehicle.

There are two types of backup camera system available in the market – wired and wireless. The wired backup camera system is the cost saving option, however the wired backup camera system installation is a bit difficult than the wireless backup camera system. You need to consider the cost of install the backup camera system,especially when you shopping the backup camera system from online shop like Amazon.com.However, if you would like to DIY your own backup camera system, you can figure it out finally, i am sure. Also, buying a backup camera system from a retailer shop or vehicle service stop, most of them provide free installation service, or at least the price you pay already included the installation package.

Buy for a reliable backup camera system for one time and it will work for many years. A lot of manufacturers are selling good quality branded backup camera systems at a fair price. It is a good idea to check reviews provided by other customer before you place an order online for backup camera system, Generally,A good quality backup camera system will cost around 150USD-200USD, which is a small price to pay for considering the safety it can provided. If you ask anybody who already installed backup camera system on their vehicles, they will proudly tell you it worth the money.

Luview Co., LTD has been engaged in providing high quality backup camera system as well as other vehicle camera products and solutions for car, SUV, truck, van and other vehicle. Either you want to be a Luview camera products dealer or want to find a local dealer of Luview vehicle camera products, you can send email to : [email protected] for more details.

Why car camera pixels only 0.3 million while cellphone camera up to millions

Why car camera pixels only 0.3 million while cellphone camera up to millions ?

Currently,it is very common for a cellphone with a 8 million, 12 million or even 20 million pixels camera,but when it turn to car camera, we may found the normal reverse car camera only with 0.3 million pixels, a car camera with one million pixels was regarded as HD camera,why ?

The main reason is that the traditional automotive industry with features of “slow”, any new technology and products to be used in the car must go through a long R & D and verification period, the phone can changing generations once a year,but the car needs at least five years. Of course, finally it depends on the market and the cost. This is a general answer to this question.

From technical point view, whether it is high and low temperature, vibration, EMC problem etc., can be fully designed in accordance with the car requirements. Mobile phone camera with the consumer price chip,it is fine to change car-level chip on car.

Since the technical is not a problem, then why the car camera pixels is still so low ?

A complete camera system should include a camera ( mainly regarded as video/image sensor ), the video transmission (including CVBS LVDS and Ethernet) and the display device (lcd display).

Firstly, camera sensor: currently meet the car-level requirements sensor and has been mass production is mainly 0.3 million pixels camera (which is used in everyone’s car), and 720P camera ( with around 1 million pixels ) two types. 720P image sensor is only mature in recent years. At present, the price of the two image sensors is about three times in difference. Technical requirements can be met,but the final cost will be relatively increased a lot.

Secondly, the transmission:
Standard definition: the current normal quality camera are used CVBS signal format transmission, CVBS is probably used twenty years ago at home on cable TV. Theoretical transmission resolution is only a few hundred thousand pixels. This transmission method is very mature, and has been used in the car for a long time, there is no problem. And the signal can be directly sent to the image sensor output, no additional encoding chip needed, but has a low requirements for the transmission cable. Its advantages are the cost and stability. The most important is that most lcd display reserved input interface is also CVBS.
High definition: including LVDS and Ethernet two types. First LVDS codec chip is not cheap, wire is also very expensive,and used in camera only in recent years. Ethernet car PHY is also very expensive, but no requirement for wire, although the Ethernet in the civilian sector has been mature, but in the car only a few famous car manufacturers such as BMW dare to use.

Thirdly, the display, it is still the video interface problems, because almost all of the display manufacturers reserved the interface for car cameras are CVBS, that can only use a 0.3 million pixel camera. To display the 720P camera, you must set aside the LVDS or Ethernet video interface. Camera manufacturers and display manufacturers are generally not the same company, so they will not just make changes for you,only car manufacturer can promote their change, and the car manufacturers are very sensitive for the use of new technologies and costs , Unless all competitors are using, then they will seriously consider. Frankly speaking, our company has been developed the 720P car camera two years ago, but till now there are still few domestic car manufacturers really intend to use it.

Technically really no problem, the problem is that the car manufacturer is not willing to spend such manpower and cost.For the new things and technology, in general,Europe and the United States may try first in luxury car,then in civilian car, and then use in Chinese market through the joint venture in China.Now a lot of luxury cars in Europe and America used a 720p high definition camera, and I guess it still need 5 years to be popular in Chinese and other developing countries civilian class car , so let’s just wait for it.People who can not wait to buy, can buy a 720p rear view car camera from after market, and use a display that can match this hd car camera.

Dashboard camera frequent asked questions and problems shooting

Dashboard camera frequent asked questions and problems shooting

Dashboard camera is a necessary safety driving equipment for car owner. This post summarizes some problems encountered during using of dashboard camera, and gives the analysis and solutions to those buyer who know a little about dashboard camera for references:

1.during video capturing, dashboard camera will automatically stop, can not take images and videos, how to solve?

Reason analysis: Once shooting high definition video,the data will be larger data larger, each frame of video will be stored in the SD card during shooting, if use poor quality or low speed SD card for storage, memory card processing speed can not keep up with the required speed for dashboard camera recording , then the automatically stop phenomenon will be appear during video capturing, and can not take pictures or video.
Solution: Check if the memory card has enough space. Please use high speed memory card which compatible with dashboard camera, high-speed memory card usually has C4, C10 and other marks, we recommended you to choose C10 memory card. Check whether the loop recording function turns on in the menu,whether screen saver function turns off.

2.recorder recording is not continuous, recording for dozens of seconds then it stop, but after a while it began to record ?

Solutions: Turn off motion detection. May buyer set the motion detection function after receiving the camera,but many buyers do not understand the motion detection function. Motion detection is used when parking,it is not used when driving.Once turn on the motion detection function,if there are horizontal objects movement before the lens, the dashboard camera will record ; no horizontal objects before the camera it will not record.

3, When we play back pictures and video, appear “file error”, “memory card error” or “Custer size wrong. Please format” tips, how to resolve ?

Reasons analysis: As the shoot high definition video files stored in the low speed card or poor quality memory card,the memory card can not completely capture the video, resulting in file loss, the screen will appear “file error ”
Solution: Please use a computer to format the memory card, then format the memory card in the dashboard camera menu again; replace a genuine Kingston ,Sandisk or other brand name C10 high speed memory card. It is recommended to use the original memory card equipped with the dashboard camera or buy memory card from the seller, because you can ask the seller to test it with your dashboard camera model,so it fully comply with your dashboard camera.

4.Why the captured video or images foggy ?

Reasons analysis: if there are obstacles, dirt on the dashboard camera lens,or dirt in the car front windshield , it may cause unclear or foggy images and videos.
Solutions: Check if there are dirt, fingerprints on the camera lens; before shooting, use the lens paper to wipe the lens; check the lens protection film is torn off or not; the front windshield is clean enough or not, you can use dishcloth to wipe.

5.In the cloudy days or indoor light source, the image quality is not perfect ?

Reasons analysis: due to cloudy or indoor light scene, the surrounding environment is dim, shoot video quality is worse than video captured in enough light circumstances, this is the normal situation. But sometimes it may caused by wrongly white balance setting.
Solution: Please check whether the machine “white balance” function is set to automatic; set the exposure compensation level step by step and then check the display changes to determine the effect of setting; check the dashboard camera angle, the camera can not directly face the strong light, the correct placement is to maintain the dashboard camera in horizontal line,without too much deviation, the color change problem usually because of wrong settings,you can try to restore the default settings in the settings menu.

6.Press any key and does not react, can not set the menu and stop working;but pull out the TF card and you can set menu normally, how to resolve ?

Reasons analysis:dashboard camera use poor quality or low speed memory card; TF card internal circuit shortage; the charger not match the dashboard camera;frequent operate keys in a short time .
Solution: Replace current memory card with genuine Kingston or Sandisk memory card; use original charger; reset the dashboard camera;

7.Why the screen be black after recording for a period of time, but the lights still lit?

Reasons analysis: This is because the screen saver function (timer off screen) is set.
Solution: Press “MENU” to enter the system menu, select the “screen saver”, press the Enter key to enter, turn off the function.

8.The dashboard camera can working under normal circumstances, but after connect to the car charger, it can’t work?

Reasons analysis: This problem occurs because the car charger output voltage does not match the dashboard camera working voltage.
Solution: Please choose the right car charger for charging, 5V dashboard camera should use 5V output car charger. If the car charge voltage dropping module damaged,it will lead to too high output voltage, but if USB output voltage exceeds 6V or more, will cause the dashboard camera instability, or burn the dashboard camera power IC module .

9.Turn on the motion detection function at night for a while ,then dashboard camera lack of electricity ?

Reasons analysis: motion detection function is generally open during parking at night, parking off the car,the car will stop power supply to dashboard camera, as the dashboard camera built in battery can only supply about 3-10 minutes, if the dashboard camera needs continuously working at night, need to connect an external power source to the dashboard camera.
Solution: can be connected to power bank or automotive battery for power supply, but the power bank must have voltage monitoring and current monitoring functions, using of inferior brand power bank may also cause the dashboard camera’s motherboard IC power module damage.If you connect it with car battery, you need to use voltage dropping module with low voltage protection functions.

10.Dashboard camera can’t boot ?

Reasons analysis: whether the dashboard has enough voltage; whether the dashboard camera uses a high speed memory card; whether the dashboard camera can be powered normally.
Solution: Use the car charger to fully charge the dashboard camera; use the high speed memory card (C10 brand name memory card); charge the dashboard camera to see if it can be powered normally; press the RESET button to reset and restart the camera. If above being tried,and still can’t boot,may be there is a problem with dashboard camera, need to contact the customer service center of manufacturer for help.

11.When the dashboard camera turn on the video loop function, after using for 1-2 months,frequently occur the situation of can not record phenomenon ?

Reasons analysis: If the video loop function is turned on, this phenomenon occurs may because of two reasons: the dashboard camera gravity sensor set to a high sensitivity,gravity sensing is easy to trigger during working, so the recorded videos are protected, the protected video file can’t being overwritten by the loop; or use a poor quality or low speed memory card;
Solutions:Format the TF card or Press the “MENU” button to enter into the menu, select the gravity sensor, press the Enter key to enter, select “low” option.

12.Why the recording time is not my pre-set time frame ?

Reasons analysis: the software system segment and save the file sometimes not strictly in accordance with the set time ,but as long as the video will not missing a second,then it is OK. In addition,use poor quality or low speed memory card; open the motion detection function, or high gravity sensor sensitivity settings may lead to file segmentation not strictly in accordance with the set time.
Solution: Please format the memory card or replace with a high quality C10 high speed memory card; press the “MENU” button, enter the function menu, turn off the motion detection function, or set the gravity sensing sensitivity to low.

13.Image black or shiny?

Reasons analysis: As the brightness contrast during the shooting ,it is affecting the dashboard camera’s automatic exposure function.
Solution: You can correct by adjusting the exposure compensation (EV) value in the dashboard camera setup menu.

14.Dashboard camera noise a bit large during recording ?

Reasons & Solutions: Once the dashboard camera in low battery conditions,it will produce low power current noise. Of course, there are some dashboard cameras on the market using motherboard with worse filter design, no doubt their current noise will be large .Some times car charger interference will be obvious ,please try to change another car charger.

15.Dashboard camera can’t automatically recording when connected to car charger ?

Reasons analysis: Car charger voltage and dashboard camera voltage does not match; USB pin sequence is wrong; memory card does not have storage space.
Solution: Replace a car charger that matches the dashboard camera voltage; remove or format the contents in the memory card and turn on the loop video function.

16.Currently, the car battery output voltage is usually “12V, 24V”, I would like to ask if battery with these voltage value,can dashboard camera access for power supply?

Answer and solution: dashboard camera input voltage is 5V, original car charger charger output voltage is 5V,car battery output voltage is 12-24V, so the dashboard camera must use a voltage dropping line ( module ) to access 12-24V car battery, and can connect to car charger directly.

17.Once you set up an operation , how to save?

Solution: short press OK/REC button; then press the MENU button when exit, pre-set can be saved.

18.Setting current time, after turn off for a period , restart and it will restore to the default settings, how to solve?

Reasons analysis: When the time setting is executed under low voltage (3.3V, normally 4.2V), the set time can not be memorized, resulting in the inability to save the current time setting.
Solution: It is recommended to set the time and date in the case of sufficient power.

19.Shooting the sky, the water and other scenes, the image is very dark, image color change, easy to distort, how to solve?

Reasons analysis: Larger contrast scene will affect the camera’s automatic exposure function, resulting in image discoloration.
Solution: You can correct by adjusting the “(Exposure Compensation) EV” value in the dashboard setup menu.

20.Dashboard recorder interfere radio?

Solution: unplug the car charger, use the built in dashboard camera battery to see if it still interfere the radio; to determine whether the car charger interfere or dashboard camera circuit interfere. Of course,if the same dashboard camera on the different cars, some cars were disturbed, and some cars anti-interference. Then the car charger and car radio frequency is repeated,please replace the car charger.

21.Get power supply from the fuse box or from the reading lamp ?

Solution: Better to get power supply from fuse box, connect the dashboard camera to fuse box with a voltage drop line , relatively simple and circuit can be checked easily.
Get power supply from reading lamp is more complex, you need to test the voltage and current, and must find the 12V output line and earth wire, you also need to observe the voltage changes before and after the engine starts.